
Introduction :
In the past, if you wanted to create mobile applications for different operating systems, you had to learn the specific programming languages for each platform (Java for Android and Swift/Objective-C for iOS). This meant that you needed separate teams to develop two applications with the same features but different languages, resulting in high costs and time wastage. However, in the present time, we have hybrid mobile frameworks that offer shorter development cycles, improved application performance, and compatibility with both Android and iOS.
One popular hybrid framework is React Native, which was developed by Facebook. It allows the creation of native-style apps for both iOS and Android using JavaScript. Initially, React Native was only designed for iOS support, but it now also works with the Android operating system, enabling the rendering of mobile user interfaces for both platforms. When discussing frameworks, the term boilerplate often comes up. Boilerplates are useful in eliminating repetitive tasks and saving significant amounts of time. In the realm of React Native, the most well-known boilerplate is Ignite.
In the Ignite framework, there are several key configurations available, whether you choose to use Expo or React Native. Some of the most important ones include:
- React Navigation: This configuration provides a way to navigate between different screens within your application.
- Mobx State Tree: It offers state management capabilities, allowing you to handle and organize application data effectively.
- Typescript: Ignite supports Typescript, a popular statically-typed programming language, which brings type safety and improved developer experience to your project.
- Apisauce: This configuration provides an easy-to-use API client for fetching data from external APIs.
- I18n (Internationalization): Ignite includes support for translation with I18n, enabling you to easily localize your application for different languages and regions.
- Reactotron: Similar to Redux dev tools for web development, Reactotron offers debugging capabilities for monitoring and inspecting the application state in React Native.
Additionally, Ignite offers other features such as AsyncStorage for data persistence, Keychain for secure storage, Themes for managing app appearance, and more. These configurations and tools contribute to the overall efficiency and robustness of Ignite-powered projects.
1- Create a react native app using ignite :
To create a new React Native app, you can execute the following command in your terminal:
npx ignite-cli@latest new <app-name>
After executing the command, it may take some time for the new project to be generated. Once completed, your project structure will resemble the following:
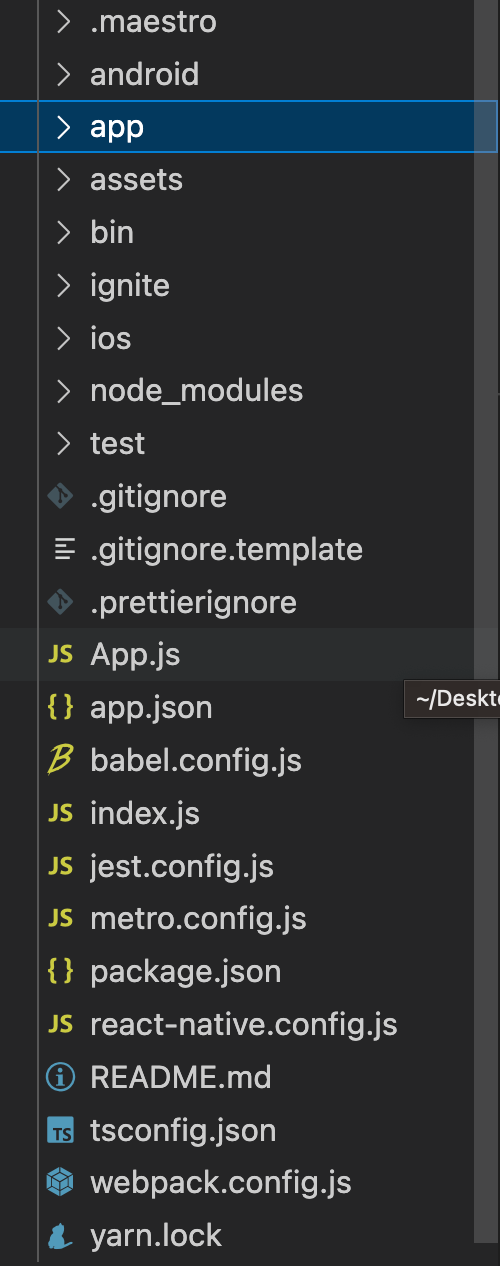
When you generate a project using Ignite, it sets up several important folders, each serving a specific purpose. These include:
- android: This folder contains Java code that is used for building the application specifically for the Android operating system. It includes platform-specific configurations, resources, and modules required for Android app development.
- app: The app folder is where you'll find the heart of your React Native code. It contains various directories such as models, screens, components, and utilities. This is where you'll write your application logic and UI components using JavaScript and React Native.
- ignite: The ignite folder holds Ignite-specific configurations and templates. It includes files related to generating screens, models, and components using the Ignite CLI. This folder provides a structured approach to code generation and follows certain conventions to maintain consistency across the project.
- ios: Similar to the android folder, the ios folder contains Swift and Objective-C code used for building the application specifically for iOS. It includes platform-specific configurations, resources, and modules required for iOS app development.
- .maestro : The .maestro folder typically contains the workflow files for end-to-end (E2E) testing using Maestro in an Ignite-generated project. E2E testing is a method of testing the entire application flow from start to finish to ensure that all components and systems work together correctly.
These are the main folders you'll encounter when working with an Ignite-generated project. In subsequent series, we can explore other folders and their specific roles in the project structure.
2- Setuping a well structured react native project
A well-structured React Native project facilitates easier testing and maintenance of the code. In this section, we will outline the process of setting up a project. The Ignite boilerplate already provides an efficient structure for our project, including folders like utils , services , etc...
2-1- Change ignite template
The Ignite boilerplate incorporates three main concepts: Screen, Model, and Component.
- Screen: Screens are the starting components for each screen in the application. They serve as the entry point and container for the UI elements and logic specific to that screen.
- Model: Models are used to define the structure and shape of objects within the application. They are commonly utilized for state management purposes, allowing you to manage and manipulate data effectively.
- Component: Components are reusable pieces of UI functionality. They are typically implemented as React hooks, representing interactive elements such as buttons, checkboxes, and more.
To create a new screen in the application, the first step is to execute the command npx ignite-cli followed by the screen generator, specifying the desired name. This command generates a new folder with a .tsx file named <name>Screen.tsx (the name is converted to Pascal case by the generator).
To configure the screen generator, you can modify the template located in the ignite/screen folder. Adjusting this template allows you to customize the generated code according to your specific requirements.
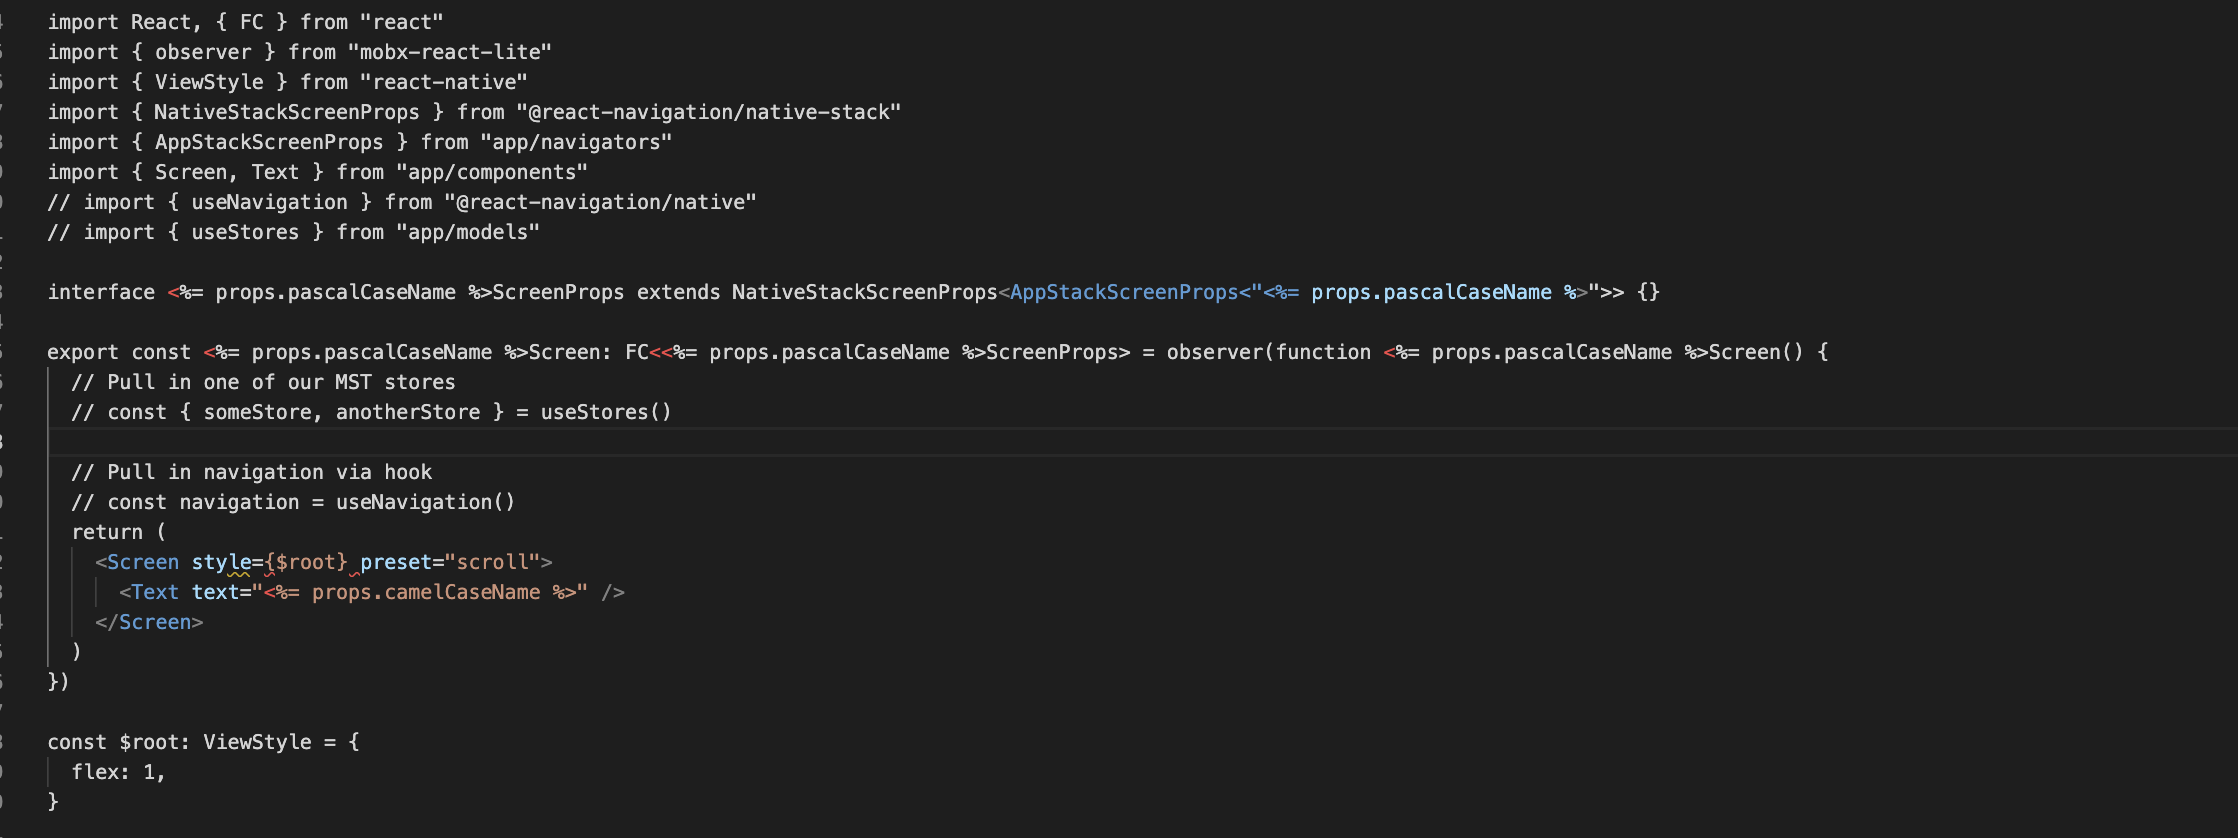
Indeed, the dynamic variable in the template is the name of the screen, which is transformed into Pascal case to maintain consistency with coding conventions.
Regarding the style implementation within the main file of the screen, it is considered best practice to separate concerns and keep the code organized into logical units. It is recommended to split the code into two separate files to handle styling and logic independently.
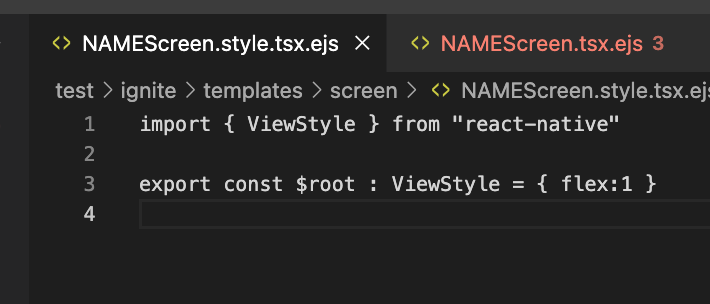
By dividing the code into separate files, you can achieve better code organization and maintain consistent styling throughout the entire project. This separation allows for easier maintenance, readability, and collaboration among team members working on different aspects of the screen. In order to accomplish that, we generate a style-specific file template :
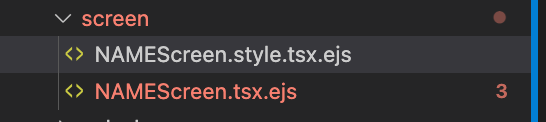
We incorporate a generic style into NAMEScreen.style.tsx.ejs.
We eliminate the style within the NAMEScreen.tsx.ejs file and include the import statement for the style.
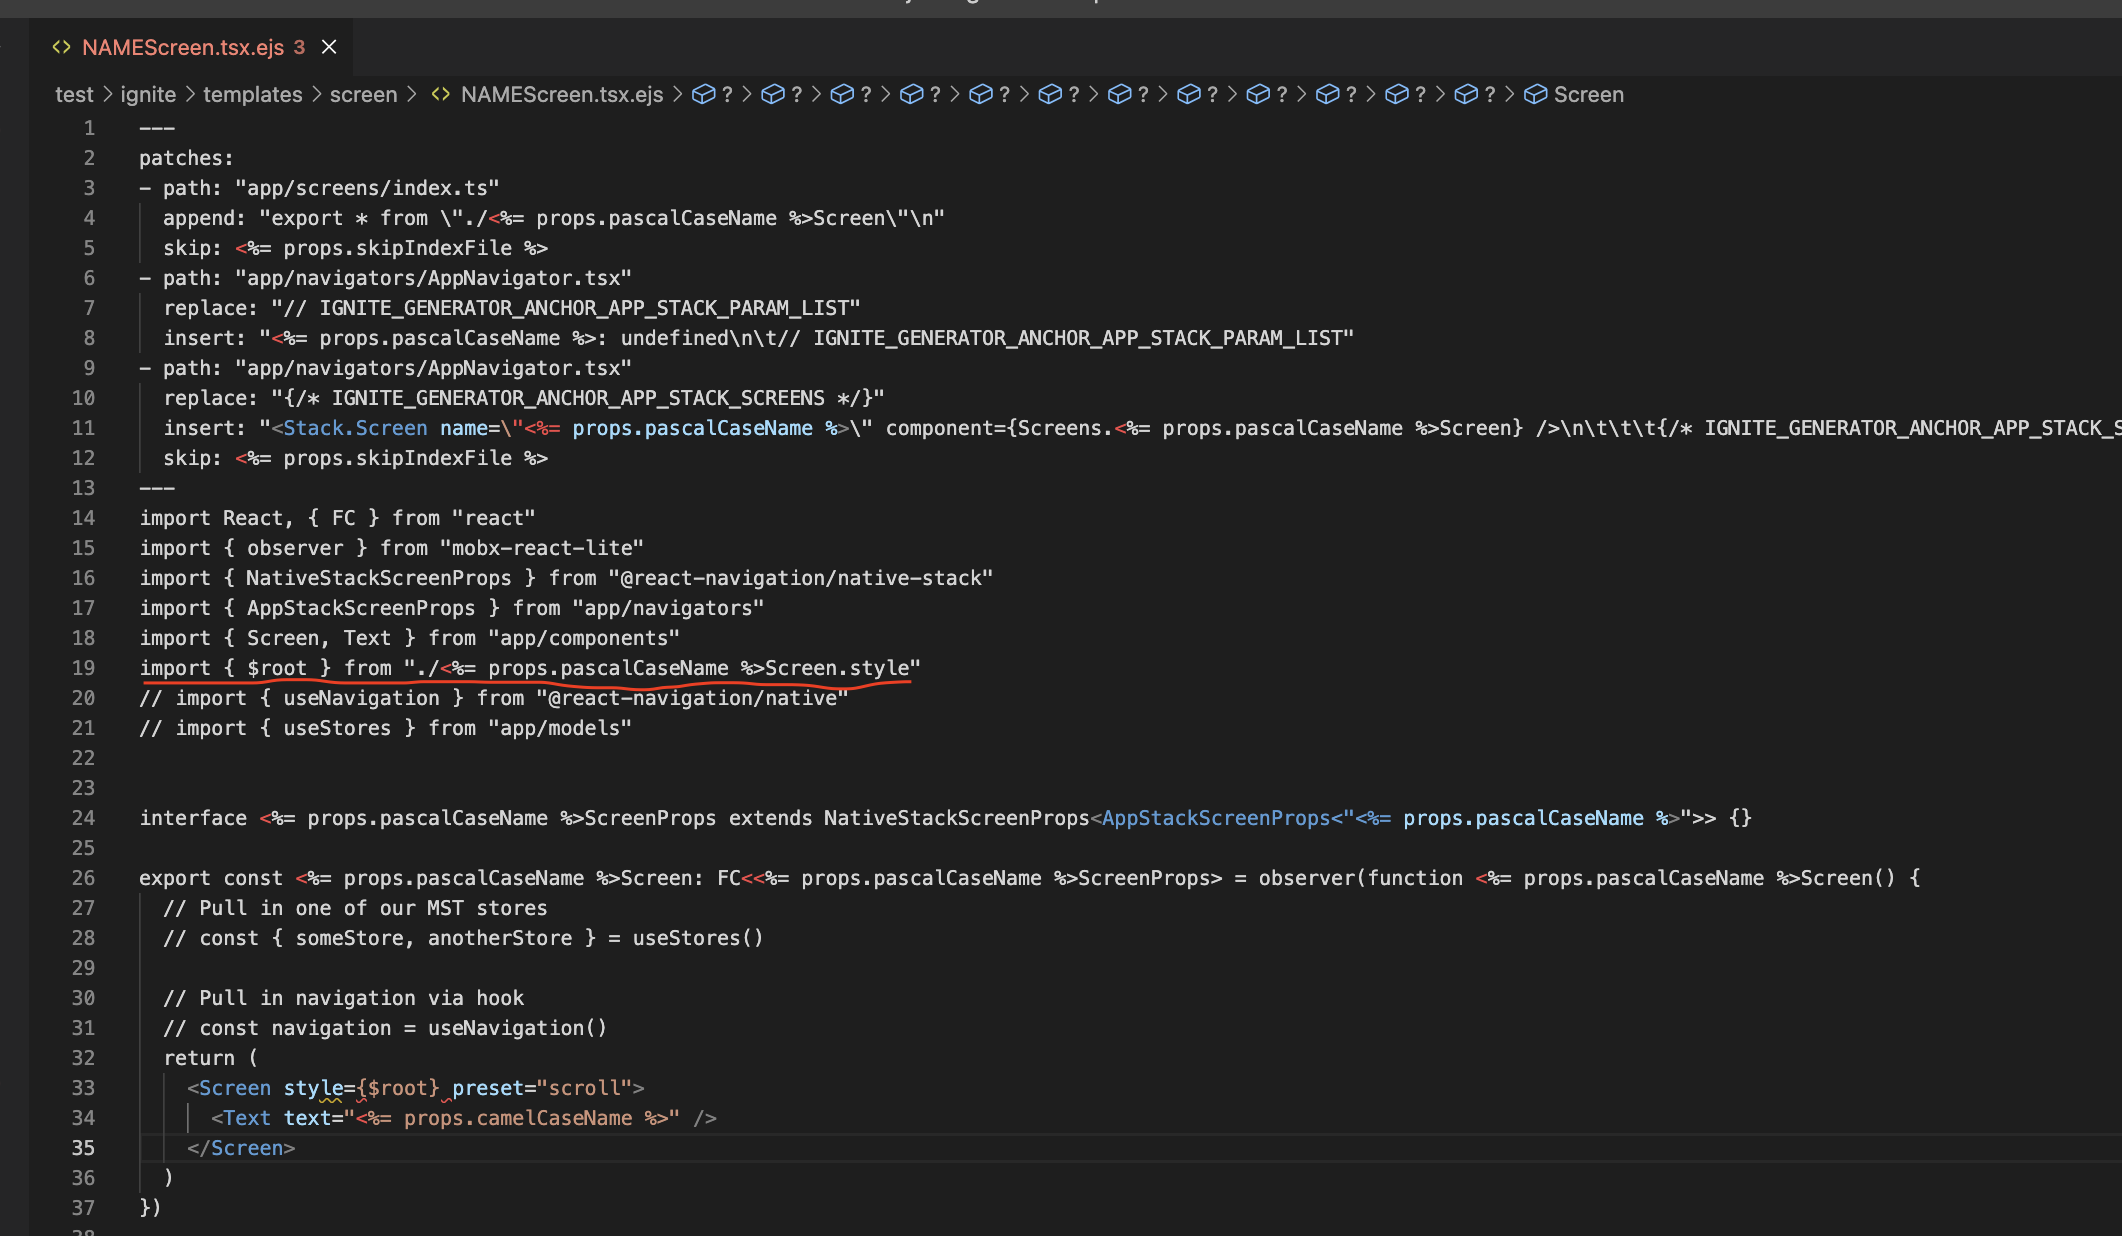
We can apply the same approach to the component and model. We remove the style from the respective files and include the necessary import statements for the style.
2-2- Naming conventions
Consistency, logic, and predictability in naming variables are crucial for facilitating understanding among developers. The objective is to ensure that any new developer joining the project can quickly and easily comprehend the purpose of functions, variables, classes, etc., solely based on their names. Here are the naming conventions for various elements:
Styling:
- For constant variables like
$root,$container, and$deskContainer, we use camelCase.
Translation:
- When working with translation files like
en.json, it is recommended to use snake_case for naming conventions, such asheader_title.
Screens, Components, and Models:
- The template has already chosen PascalCase for naming screens, components, and models.
Image Files:
- For image files, we prefer snake_case, such as
arrow_down_logo.png,sun_logo.png, etc.
Colors:
- When naming colors, we use camelCase, for example,
lighterGrey,orangeDarker,orange, etc.
Screen Names in Stack Navigator:
- When creating a new screen and adding it to the stack for navigation purposes, each screen should have a name in the stack. We use camelCase for naming screen examples like
demoList,paymentDashboard, etc.
Conclusion :
In simple terms, using the Ignite boilerplate to start a well-organized React Native project and following some approaches ( Naming convention, Separation of Concerns, ... ) is like building a strong foundation for smooth and efficient development. This method keeps your code neat, uses a modular structure, and arranges your project effectively. By putting together Ignite's tools with the best practices in the field, developers can make React Native apps that are easier to take care of, grow, and improve as they go along.