
Working on cross-team projects, we have all been in a situation where each team is responsible for a part of the project. A team that handles front-end, another that handles back-end, and maybe another team that handles data, etc…, depending on the project needs.
From my experience, while being in a front-end team, testing endpoints directly while running the other team’s back-end can be problematic sometimes, there can be issues like the project not running after the last pull due to an error in the code, dependencies don’t get installed for some reason, etc…
To be independent and integrate the API with the front-end, there is a turnaround. Mock the API using a third-party app. One of the best solutions there is “Mockoon”.
You might be thinking “Why use a third-party app to mock the API when I can just add some mocked data inside my code”. Well, using this approach will cost you more time, as you need to change your code once you finished your testing to use the real API instead of the mocked data that you added inside the code. Whereas using a third-party app to mock your API ensures that you introduce no changes to code at all, you can finish your tests, push and deploy as if you were testing with the real API.
For more details, let’s deep dive into Mockoon’s basic usage.
1. What is Mockoon and what does it offer?
As you may have understood from the above introduction, Mockoon is a desktop app that offers mocking APIs in an advanced way, with a very simple interface. You can customize your mocks while defining multiple routes, multiple responses for the same route, creating dynamic responses using templating system, importing and exporting data, or even creating multiple environments, etc…
2. How to use it:
First, let’s create a new environment where we will add later on all our routes. (Actions > Add new environment). Specify the port for your localhost, add a prefix if needed, then let’s create our first route.
a. How to create multiple routes
Quite simple, click on the “+” button, name your route, select your HTTP method, then define your body if needed as follows:
Congratulations! You have just created your first mocked route. Test it out by navigating to http://localhost:8080/facts/cats to see the result of your mock.
Keep in mind that this is just the basic usage, as we can for example set our custom request headers, serve the content of a file as a body response, add a latency for the request to respond, which will be coming in part 2 of this tutorial series.
b. How to define multiple responses for the same route using rules
Say we want to have one route that responds differently according to a path variable or a query string, how can we achieve this?
With Mockoon, this is quite simple! You can add rules on the body, on the query string, on the header, or on the path variables to serve different HTTP responses (for example if query string id = 1, I want my route to respond with HTTP status 500 and a response body saying there was an error somewhere). Note that we can use multiple rules and combine them with AND or OR operators.
After adding this rule, we can see that accessing the same URL with a query parameter “id=1” responds differently:

c. How to create dynamic responses using templating
Using Mockoon we can also create dynamic body responses for the same route by using templating request helpers either in the body or in the headers, which can be an alternative to using rules.
If you are not familiar with templating, take a look here for more details. For instance, we can use “queryParam” keyword for query strings, “urlParam” for path variables...
We can combine these helpers with all types of templating helpers, such as Handlebars or Faker.js.
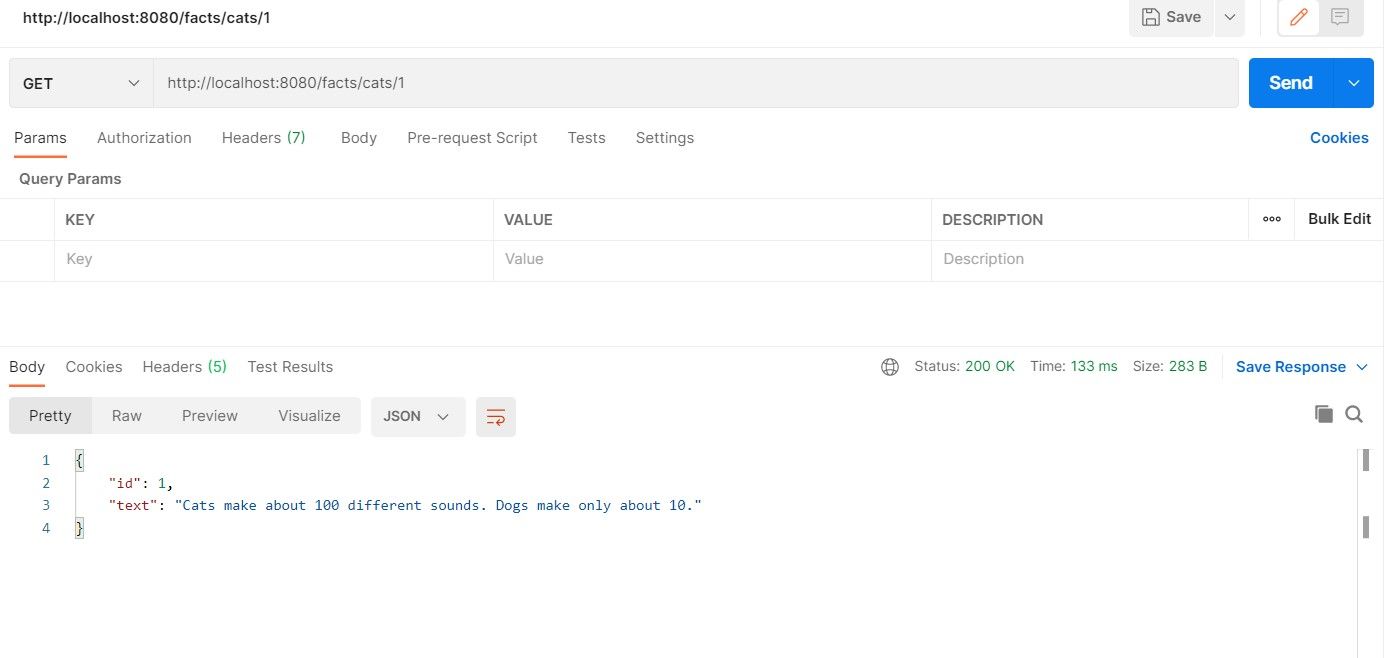
Below is an example using a switch operator on the query param “id”, if it is equal to “1”, then the response is related to the object with id 1, we also defined a default in case none of the cases is true.
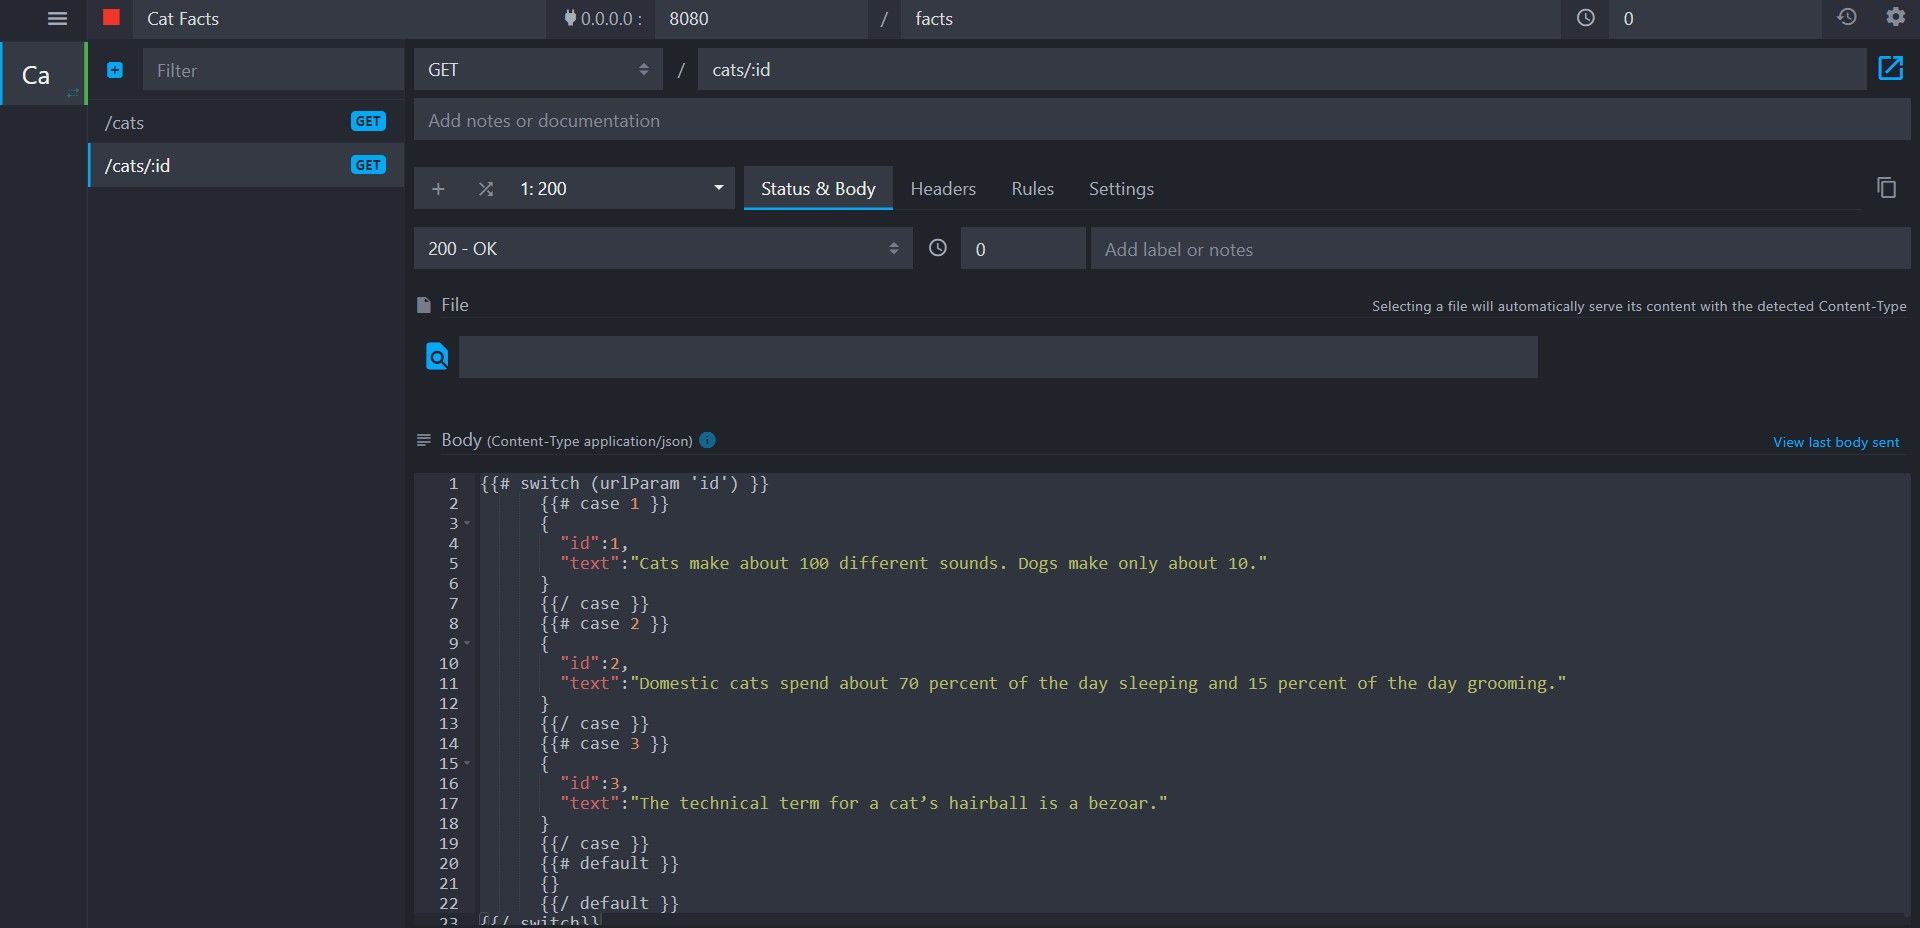
You can test it by navigating to http://localhost:8080/facts/cats/1 for example, here is the result you will get:
d. How to import or export data
The most common workflow in a project would be to create the environment, add your routes, then export the environment in a JSON file that you push to your repository, then other developers can access the file, and import it to start exploiting it. They can make changes on it also, then export the new version, make changes then push it, etc…
Now let’s see how to import and export environments.
First, let’s export our cats’ facts API environment into a JSON file, to be able to reuse it later, or to version it with your project files so other developers in your team can have the last version.
We have just exported our environment into a JSON file that we can now share with our team and push to our repository.
Now the other way back, say one of the developers in the team added some new routes and mocked them, and we want to use the latest version after pulling from the repo, in this case, we have to import the JSON file as follows:
You can delete your older environment to replace it with the newest one, or you can keep it if you decide otherwise, but keep in mind you won’t be able to run both environments on the same port.
Conclusion
The first part of this tutorial series has come to an end, we saw together how to set up your first mocked API, using Mockoon basics, such as how to add routes, how to define multiples responses for the same route, how to define dynamic responses with the usage of templating request helpers, and finally how to import or export environments. In the second part, we will deep dive more into Mockoon’s advanced usage with the help of templating helpers again, such as having dynamic data inside responses, inside request headers, …
That's it for today, I hope you enjoyed the reading.